Showing posts with label Guide and reviews. Show all posts

Redmi 6 Pro(Mi A2 Lite) Full Review After Using For Two Months

Redmi 6 Pro Mi A2 Lite images review

Redmi 6 pro was launched in India in September 11, 2018. On its launch date it was the first phone in the Redmi series to have a notch. The price of the phone at its launch date was ₹ 11,499.00 for its 3 GB,32 GB variant and ₹ 13,499.00 for its 4 GB,64 GB variant on retail stores. Actually this phone is the lite version Mi A2 and it's launched out of India with its name as Mi A2 Lite. The only difference between Mi A2 Lite and Redmi 6 Pro is Mi A2 Lite has stock android but Redmi 6 Pro has its own MIUI .
Redmi 6 Pro Mi, A2 Lite images review

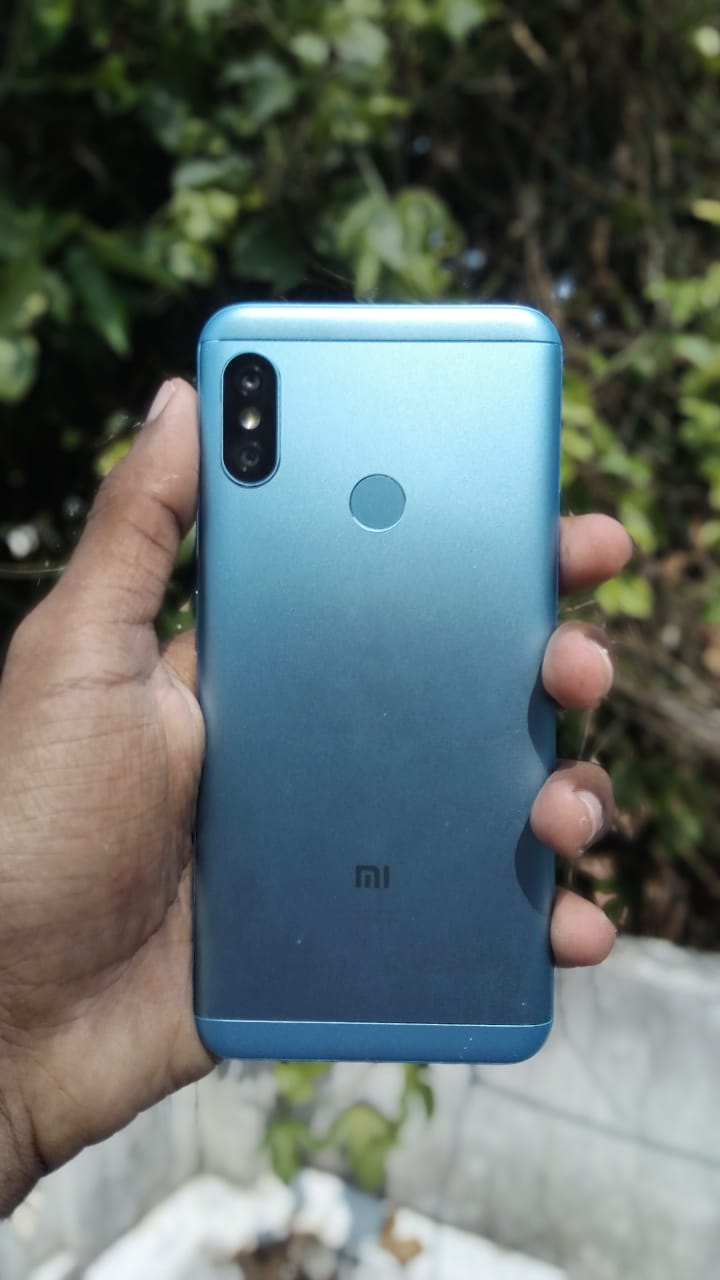
There is no notable difference on the back of the phone than its predecessors.
It has its usual metal back body with plastic at top and bottom. Its look pretty decent.

Redmi 6 Pro, Mi A2 Lite images review

While going to the front its has a notch with 14.8cm (5.84) FHD+ display. A notch isn't a big deal today. When compared to its competitors its display is small but its makes the phone compact and easy for one handed use. A noticeable con here is it has a large chin.

Now let's talk about specs:
[Source MI India]

Camera : 12+5 MP AI dual camera with 1.25μm pixels

Its camera is the best in outdoor but its working in indoor is average. 
I will put some sample images at the end

Screen: 14.8cm (5.84) FHD+ display with 19.9 aspect ratio 

Battery: 4000mAh 

This battery is awesome it can run for 2+ Days for a single charge for normal users and its last for a whole day for hardcore user like me. 

Processor: Qualcomm snapdragon 625 manufactured in a 14nm technology, Adreno 506 graphics processing unit

Even Though it is a two year old processor it is efficient in its performance and its battery life. I test many games like Asphalt 9 Legends, Modern combat 5 etc. Every thing worked flawlessly. 

Software: Android 8.1 with MIUI 10 
It's not officially confirmed but their are chances for this device to get the android pie update. Personally I like the MIUI very much because it is smooth its has very useful features like reading mode, Built-in screen recorder also its theme can be customised easily .If you are not a big fan of stock android experience then MIUI is the best UI 
Sim slot: Dedicated Dual nano sim slots+  SD card slot  
Unlike Hybrid dedicated slots allows u to use 2 sim cards and an SD card at a moment.

Sensors : Its is having all sensors for a device available at this price point like fingerprint, Proximity ,Light sensor with an additional IR blaster which allows you to use your phone as a remote for all devices having an IR receiver
Dimensions

Height: 149.33mm
Width: 71.68mm 
Thickness: 8.75mm
Weight: 178g


Network and connectivity:

Network bands
GSM B2/3/5/8 
WCDMA B1/2/5/8 
FDD-LTE B1/3/5
TD-LTE B40/41(2535-2655MHz)

Wireless 
802.11 a/b/g/n
Bluetooth 4.2
WiFi Direct,WiFi Display
WiFi 2.4G, WiFi 5G

Cons of this device:

I am writing about its cons after using it for 2 months so I can give its cons than anyone else. Front Cam of this device is only 5MP it is a bit lower when compared to other phones at this price point. It is also having some heating issue while charging.While gaming with phone its emits some heat which is avg with its massive 4000mAh battery. Also there are some lags in multitasking with this device. I found that its chin is very larger when compared to others.

The final verdict:

I recommend Redmi 6 Pro if you are looking for a good phone in 11k price segment. It is one of the the best mid rangers coming out with MIUI.
If u want a massive battery,MIUI,A notch design, Dual camera setup, Fast and responsive Fingerprint sensor and an IR blaster then go for it.

Sample Shots with its camera :

image shot on redmi 6 pro,MI A2 Lite

image shot on redmi 6 pro,MI A2 Lite

image shot on redmi 6 pro,MI A2 Lite

image shot on redmi 6 pro,MI A2 Lite

image shot on redmi 6 pro,MI A2 Lite

image shot on redmi 6 pro,MI A2 Lite

image shot on redmi 6 pro,MI A2 Lite


BUY NOW THROUGH AMAZON: https://amzn.to/2GOtFee


How to locate your device just by using Google account

locate phone using google account find my device

Google find my device is pre-installed on every android devices by google. You can use this method to track/locate your device anytime,anywhere you want. This is a very useful trick that most of people don't know. You are able to access this by either installing an android app to any of your device and sign in to the same google account which is used by the device you want to locate or use a browser on your pc to sign into your google account.

But before doing this you must be sure that

  1. Your device has an active internet connection and must be sign in to google 
  2. Google Location services must be turned on.
  3. Remotely locate this device and Allow remote lock and erase and must be turned on under the device settings.
After doing this just follow this steps

locate phone using google account find my device

  • After getting a screen like this just select the device you want to locate.
locate phone using google account find my device
  • Now you maybe asked to re-login to your account

locate phone using google account find my device


  • Now click on the locate button.
locate phone using google account find my device

  • That's it your device is located within seconds. You can zoom in this map and view its exact position.

Bonus Trick 

  • By using find my device you are able to lock your device remotely anytime anywhere. You can add a message to your lock screen. 


    locate phone using google account find my device

    • Lol you can also erase your whole device using find my device so that anyone accessing it cannot access your private data.


    locate phone using google account find my device

    Hope you find this trick useful💁💁


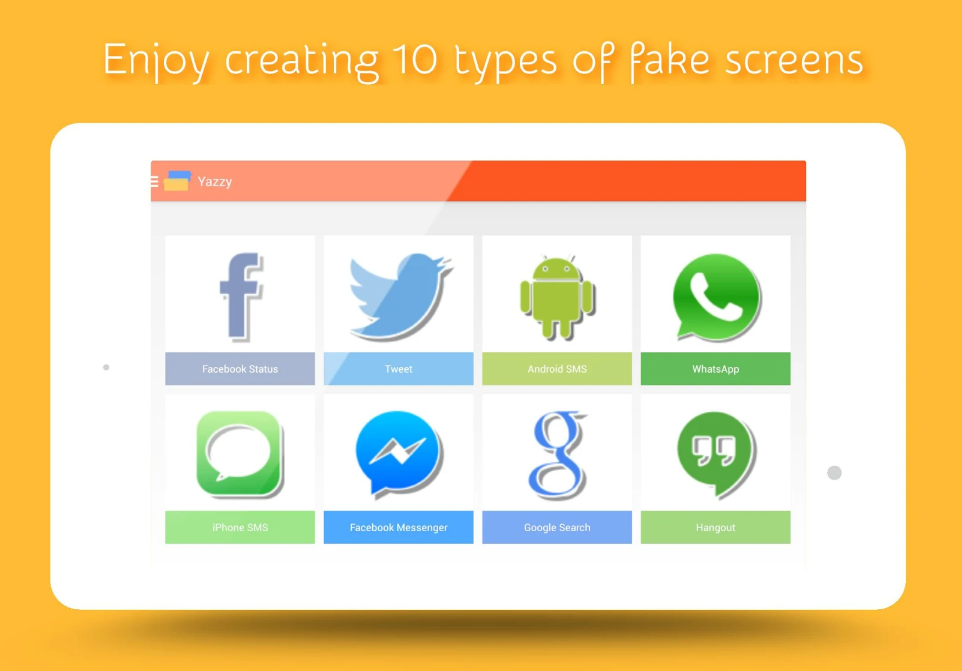
    Yazzy the best app to create fake screenshots


    With Yazzy you can easily create fake, but very realistic, conversations. I personally use this app play prank with my friends. For example you can create fake messages such that your crush proposed you through Whatsapp lol I had really done it. You can troll your friends with it. It supports over 10 types of fake screens. In the older updates like 2.21.3 it also supported  a fake screen for whatsapp but due to legal reasons they removed it.

    Supported fake screens in the latest update:
    • Telegram with emojis and images
    • Instagram post
    • iPhone SMS with emojis support
    • Facebook Messenger
    • Facebook Status with comments and likes
    • Tweets with hashtag and mentions
    • Google searches
    • Google translate
    • Ask.FM
    • Whatsapp [Only on the older versions]

    [Download via Play Store]
    But still you want to use a fake screen for whatsapp just download it from other sites like uptodown,apk mirror etc. Now let's take a quick snap @ my favourite fake screens

    Whatsapp 

    Fake screen for both android and Iphone user are available in this app.
    Everything is easily customisable date, time ,last seen,blue ticks the notification bar too easily customisable .

    We can make fake send & receive messages, Images etc I have used this feature to many times to prank my friends.  

    Instagram 

    With fake screen we can fake instagram post likes etc.

    Google Search


     You can simple fake google suggestions with this app. You time wasted on editing is now saved.

    Twitter 


    Facebook Messenger 


    Simply fake facebook messenger app with a few clicks

    Facebook Status


    You can make fake posts,images, profile,comments and like with this feature.

    Please not I am not responsible for any kind of illegal use of this app.

    Hope you enjoyed this article meet you in the next article bye bye


    How to recover your deleted files using Photorec even after formating


    Photorec is a free and open source data recovery tool designed for windows,mac,Linux,sunos etc. It was initially released on April 30 ,2002 .
    It can not only recover images it can also recover videos, MP3s, zip files etc.
    I tested it on windows and its work great. Photorec is one of the best app to recover files I ever used.

    Download button is provided at the end of this page

    Working of this app- This app separates your drive into different partition and   scans for deleted files in each and every partition till it completes its recovery process. If you want to know more about how it works
    If you want to read more about this read from there offical site

      Important note-  You can recover your deleted files even after doing a number of formatting but can can't recover your files successfully  if it is overwritten by other files.

    A big benefit of this app is you can use this app without installing it just unzip the file downloaded from here to use it .

    Now follow my instruction to start using this app.
    • After unzipping the downloaded  file 


    The reason for marking two  files in this screenshot you will see it at the end of this page so read till end.
    •  Now search for qphotorec_win.exe and open it NOTE:(You Must Run It As An Administrator) 

    • After opening it at the top of the first bar click on the disk icon which I marked it on the screenshot and select the drive from which you want to recover files. I selected my pendrive which I am going to do this test. 
    • Now go to the bottom of the screen and click the browse button and select the location where you want to put the recovered file.
    Now I am putting 1-MP3 file,1-JPG file and a video file into my pendrive and I am going to format it let's see how it works.
     After formatting it now Iam going to reopen our app. 
    • Your next step is click the search button after selecting the drive and browsing it  to a location. 
    • Your process will starts and give it some time.
    As i said I selected my 4GB pendrive and you can select even your computer's own hard drive but the time taken to your recovery process is based on your selected driver's storage space.

    Gotcha!!! within the first 10 sec i got my recently deleted files which i showed 
    you in the above images ,reason for this speedy recovery was my file was not overwritten.
    • After reaching the progress bar at 100%  now click the quit button.
    • Now go to your destination folder which you browsed earlier.
    • That's all steps are required for the recovery process enjoy.
    Lets see what all things that I have recovered from this process

       
    I have completely recovered my recently deleted files successfully!!! Along with some my older MP3 files while some of it where readable and some were overwritten.

    Now I'm going to tell you why marked two files instead of one in one of the above screenshots. The second marked file was photorec_win.exe which is an alternative version of the qphotorec.exe. You can use both version to do file recovery but this one has a command prompt screen instead of a user-interface.

    Screenshot of Photorec.exe

    Both applications have the same features but a difference I spotted while using both screens was this one shows the time remaining to do the recovery so if you want to know the estimated time use this one. Also you can show off to your friends that you are a  pro hacker if use this screen instead of a qphotorec app with a UI.

                            Downlaod Now


    If like this article please don't forget to subscribe us.📧
    Bye bye,© Evil kannevil  2018


    How to create your own unique logo for free online


    Having a brand of your own then logos are important to it. A LOGO means Logic Oriented Graphic Oriented  so its must have a good logic and graphic.But making a logo is no more a hard job there are many sites available online for logo creation. Iam introducing here a site name wix logo maker to do this job with it you can make a logo simply by selecting your theme.

    Now just follow my instructions.
    • At first click the link given below.  


    • After clicking the link you will  be on wix's official logo maker site.
    • Just click start now button

    • They will ask you to log in. I already have an account if don't have a one you can sign in with your gmail account or simply with your facebook account.  If you done this successfully a scree will appear like this⬇⬇
    • Type the name in which you want to create your logo. If you have a tagline you can add it too. After adding it just click lets go.
    • For the optimisation of the results next they will ask you for what's your logo for. Type it and click the next button.
    • To give you most suitable results they also ask you to select the type of look you want to give to your logo. I selected the modern one you can select which you like and click the next button.
    • To know your taste they will show you 5 pre-build logos with a like and a dislike button. Like those which are to your taste.
    • Next they will show some logos  according to your entries . Pick one for which suits you best. And click the edit button.
    • After clicking on the edit button u can customize and make it your own.
    • You can change its color or pick one from the inbuilt themes.
    • You can search for a specific icon and change it as you wish.
    • You can change text,shapes and anything you want.
    • After your customisation click the download button.  
    • If you want you can pay and download high resolution logo and own copyrights for it.
    • If you don't want to pay you can simply screenshot it from the previous step or you can download a free sample.
    • That's if you understood this guide and if you like us please don't forget to subscribe us. 📧 

    How to find new whatsapp statuses using sharechat


    ShareChat India is the one of India's social app to communicate with ​friends​, ​share jokes​, and avail daily news from India within seconds.
    ShareChat being the most convenient ​messaging app​, also enables you to ​make new friends​, share videos, jokes, GIFs, audio songs, ​shayaris,​ ​motivational quotes​, ​funny quotes, bhajans, devotional songs​ and funny images all in one platform.

    Indian languages like Hindi, Telugu, Marathi, Gujarati, Punjabi, Malayalam, Bengali, Tamil, Kannada, Odia, Bhojpuri, Assamese, Rajasthani and Haryanavi are all available on ShareChat’s multi-linguistic keyboard which allow its’ users to connect with ​friends​ and family in their native language, all over the country with great ease

    Well that's all wiki news personally I use this app for updating my status.
    Most of my friends use it to update their status.This app have a section known as whatsapp corner which is optimised for putting whatsapp status.

    [Click here to go to their official site] For PC users
    [Download from playstore]  For Android users

    Pros of this app-


    • Pick from a wide range of topics according to your mood. It has a wide range of topics from Whatsapp corner to devotional. It varies according to your language.


    • When u pick a topic it has a wide range of Sub-topics. For example if u select whatsapp corner it has subtopics such as Typography,BGM status,Video status etc.
    • It is not necessary to login into this app,you only require a login if u want to upload stuffs or to comment on posts. So if u wish u can browse anonymously. You can can have followers and can follow others just like similar apps 


    • Share instantly- You can share instantly the posts you like directly into whatsapp status or to groups or other persons. If you are using its official site you can download videos and save it your gallery. This videos are optimised to put whatsapp status. Most of the videos are 30 secs which are the maximum time supported for a status video.
    Cons-
    • Watermarks are the worst thing in this app every images and videos you share will have its default watermark as sharechat most of us hate it. If u ask me I only share stuffs got from this app only after cropping. But to hide their watermarks from their videos are a nightmare.
    • This app has set permission to block you from capturing screenshots and videos from this app because if you capture their screens they can't put their watermark into it. You can't capture their screens if u use sharechat app but still you can do it if you are surfing it with a browser.
    Overall performance is good this app is better than all of the similar apps which are available on playstore. My personal opinion is this is the best app which help u to find nice whatsapp status.

    How to connect with pc without using usb cable


    Xender web- With this feature u can connect your device with PC and can use it like while u connected it via a USB cable actually much more features than it. You can also use share-it app to connect with PC like this but here I use xender app for it. Follow my instructions given below⇓⇓  
    Note: You don't need mobile data to use xender web.

    If u don't have this app u can download from playstore


    • First open your Xender app and open options tab then select more option there u can see connect to PC like this.⇧⇧

    • Then click on the create hotspot button
    • You can use both hotspot and wifi to do this here i use a hotspot connection.
    • Now open your wireless network tab and connect with network starting with xender  
    • your next step is go to a web browser I use chrome and search for this address while connected to this wireless network 192.168.43.1:33455
    • wait for a moment and if u done all this things correctly a pop up window will appear on your phone 

    • Now tap the accept button .
    That's all for establish a connection and now you can start sending and receiving  files.Once u connected you can bookmark the page and easily access it.

    Special features-
    After you are connected you can remotely play your images from your phone  into your pc 

    • Just select to play images directly into your pc 


    Your image will be instantly  played on your pc like this⇊⇊ 


    Play music without sending-
    U can play music on your pc even without sending using xender web because of the super speed feature of this app.


    Access content-
    like you are connect via a usb cable. You can save ,delete files just like u do when connect via a usb cable.


    Upload files back-
    You can also sent files back to your device using the upload button.

    Seperate files into categories-
    It also separate files into different categories such as images,videos,music documents ,zips and APK's. So it is easier to find than using a usb cable.

    I hope after reading this article you will you this feature if u don't have a usb cable,as it is a perfect alternative and a lot more than an alternative.✌ 💃💃